Emailing registrants
With our platform, you have the option to send emails to either all of your registrants or specific registrants.
To access the "Mass Email" section, just follow these simple steps:
- Navigate to the View Registrantssection, where you can view the information of your registered participants.
-
To email registrants you have two options:
-
Click the "Mass Email" button located at the top of your list.
-
Check the checkbox to the left of the registrant's name, and then click the "Email" link next to "Apply to checked".
-
Please explore the following options to discover more about the "Mass Email" section.
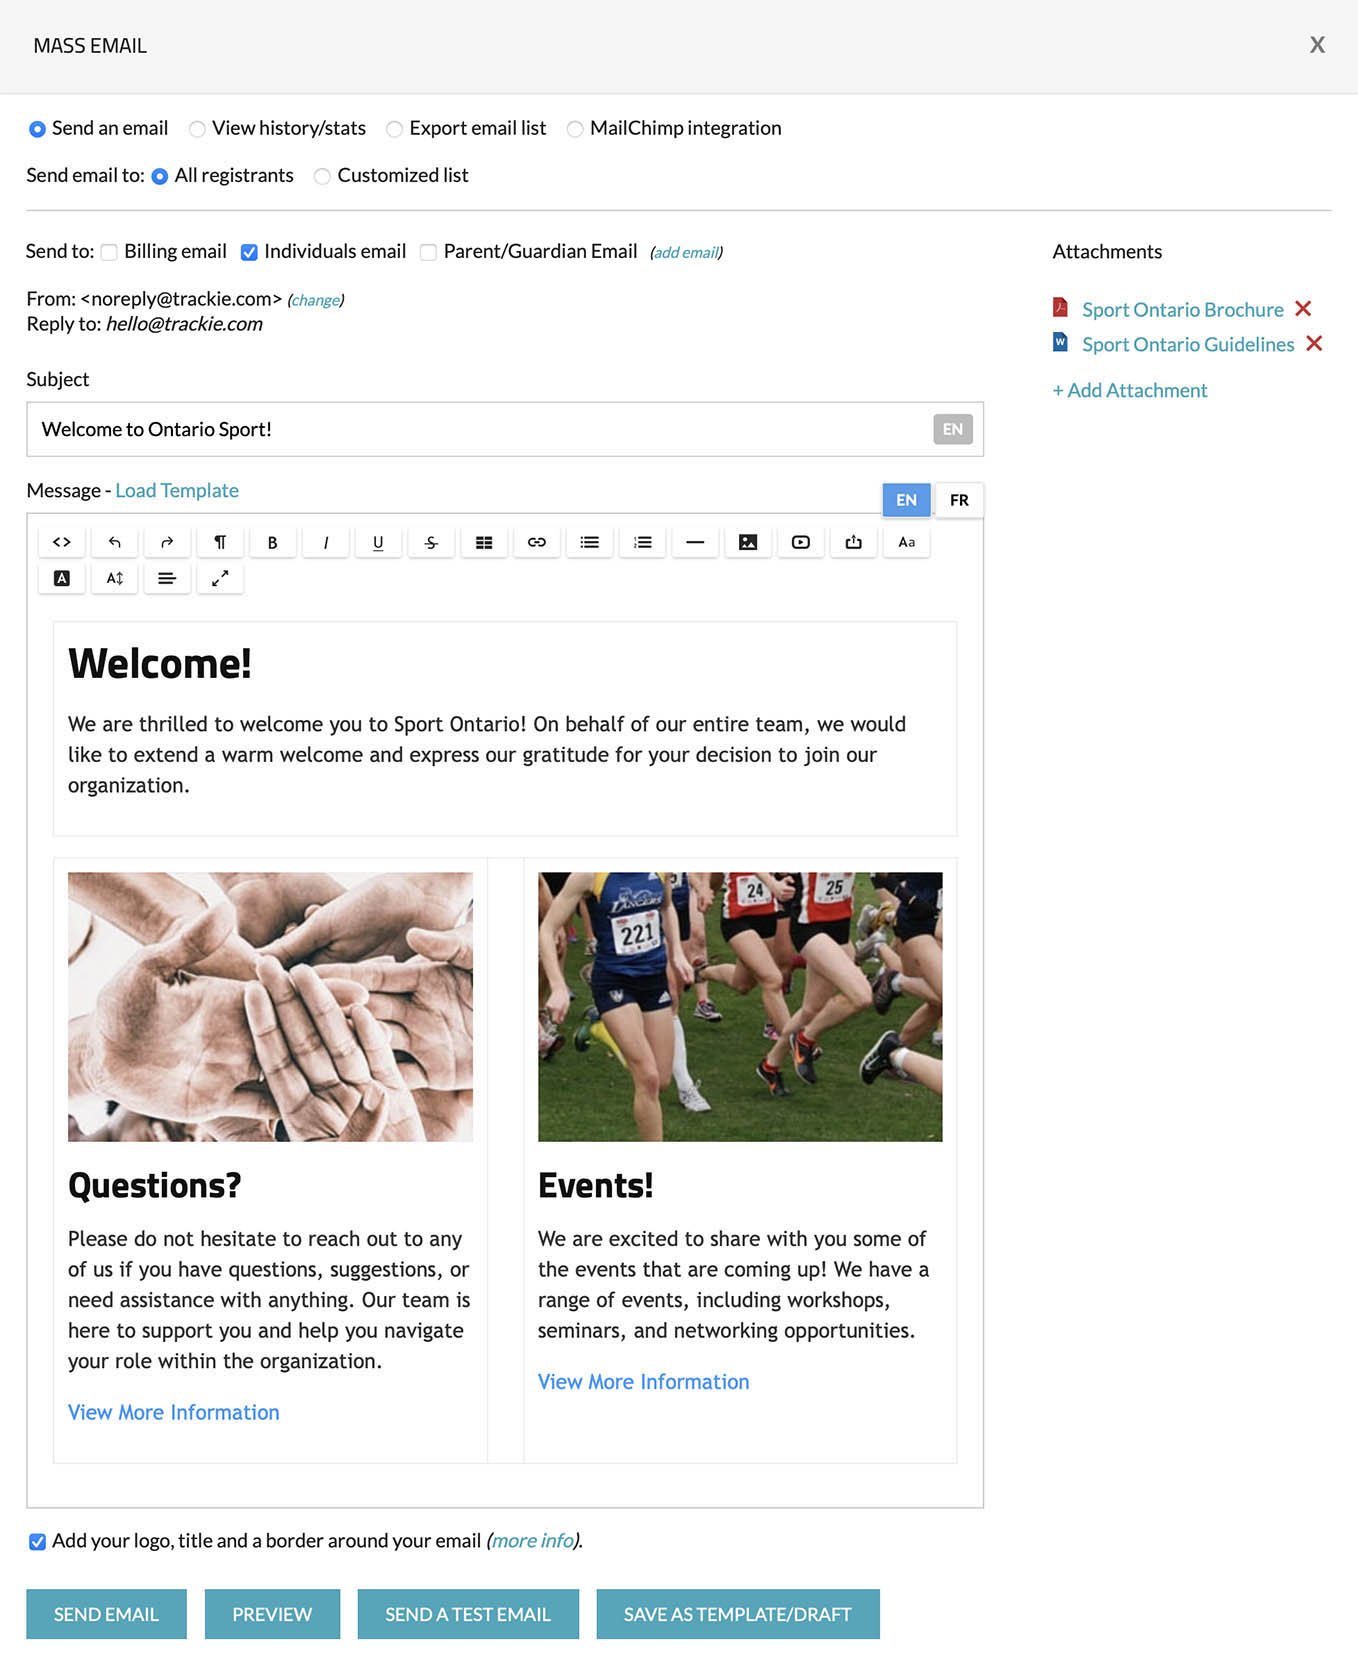
The interface for the "Mass Email" feature is presented below:
Settings
Send an emailInterface that allows you to send an email to your registrant(s). View history/statsAllows you to view past emails and provides statistics on deliveries, opens, bounces, and clicks. Learn more Export email listAllows you to export your email list to a spreadsheet file that can be easily opened in external programs like Microsoft Excel. Learn more MailChimp IntegrationAllows seamless integration with MailChimp, allowing you to connect your registration email list and easily send out emails to your registrants using MailChimp's powerful email marketing tools. Learn more Send email to:You have the following options:
- All registrants: This option allows you to send an email to all of your registrants.
- Customized list: This option allows you to send an email to a subset of your registrants.
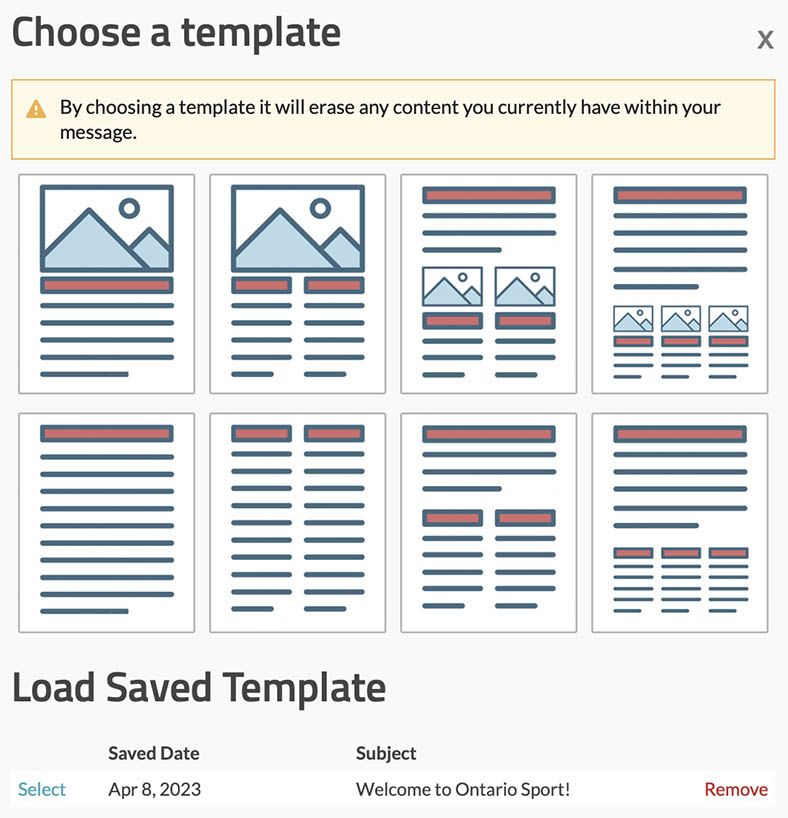
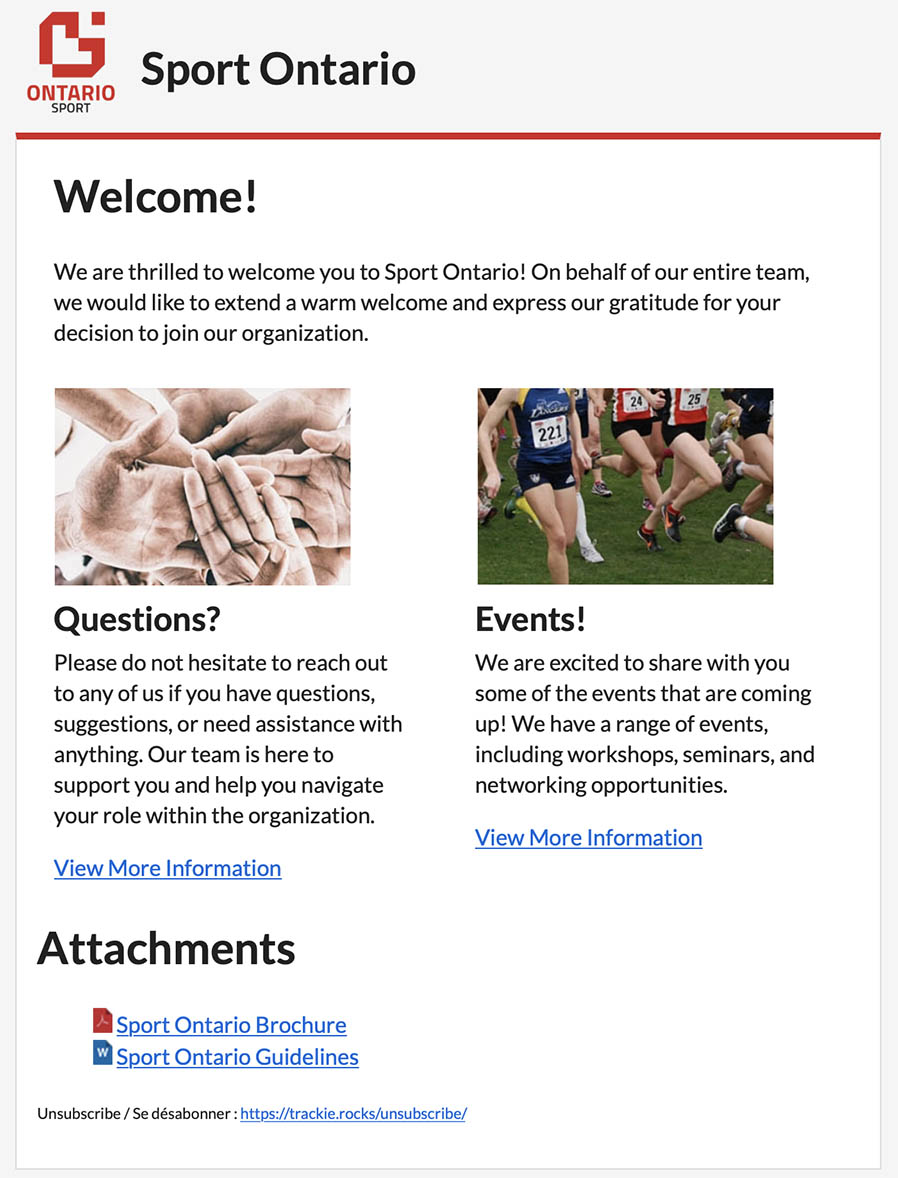
Send to:Our platform gives you the flexibility to specify what type of emails you want to send to, depending on the email information collected from your registrants. For example, if you collect billing, individual, and parent/guardian emails, you can easily send emails only to parents/guardians if needed. From / Reply toThe sender of the email that will be sent from the system. To modify this, simply select the "change" hyperlink and follow the provided instructions. AttachmentsWith this functionality, you can easily attach various file types such as PDF documents, Word documents, images, and more. SubjectThe subject of the email that will be sent out. MessageThe body of the email that will be sent out. Load TemplateWe offer the flexibility to select from a variety of pre-built email templates. Add your logo, title and a border around your emailWhen this feature is activated, it includes your organization's logo and adds a border to your email. Please refer to the provided screenshot below for an example of how this looks. Send EmailThe button that initiates the dispatching of the email. PreviewDisplays a preview of the email, providing a visual representation of its appearance. Send a Test EmailIf you wish to send a test email to yourself or others prior to dispatching the email to your list of registrants. Save as template/draftIf you want to save your email template for later use. You can load these saved templates/drafts by clicking the "Load Template" link.
Here's an example of how the actual email looks once sent:
After sending emails, you can view past messages and track statistics on deliveries, opens, bounces, and clicks.
To access the email history and statistics, simply select the "View history/stats" radio button and click on the "View/Stats" link next to the email you wish to review.
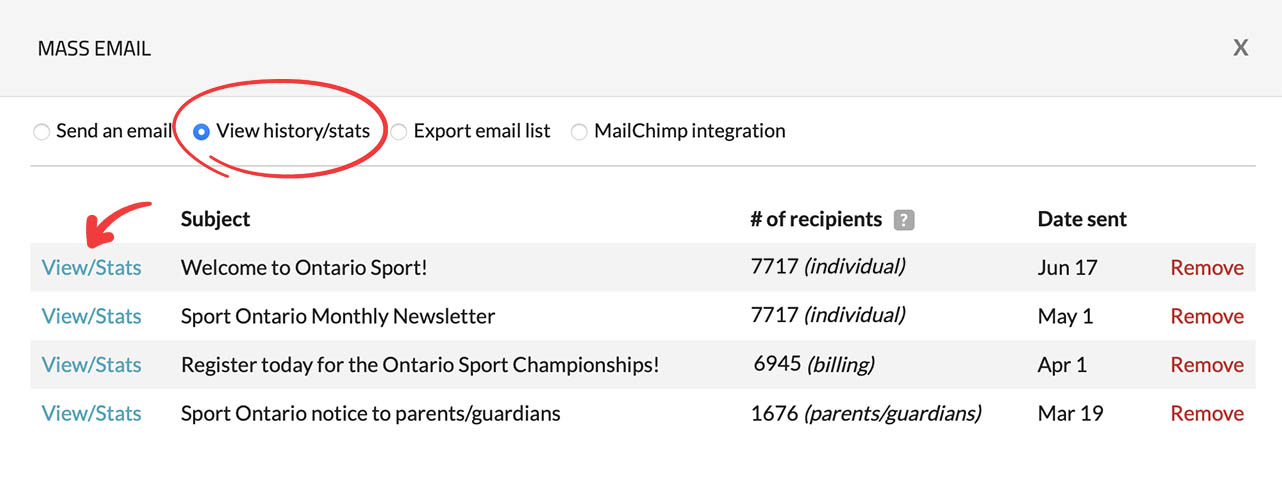
Upon clicking the link, you will be directed to the "Message Statistics" interface, which will be displayed as depicted below.
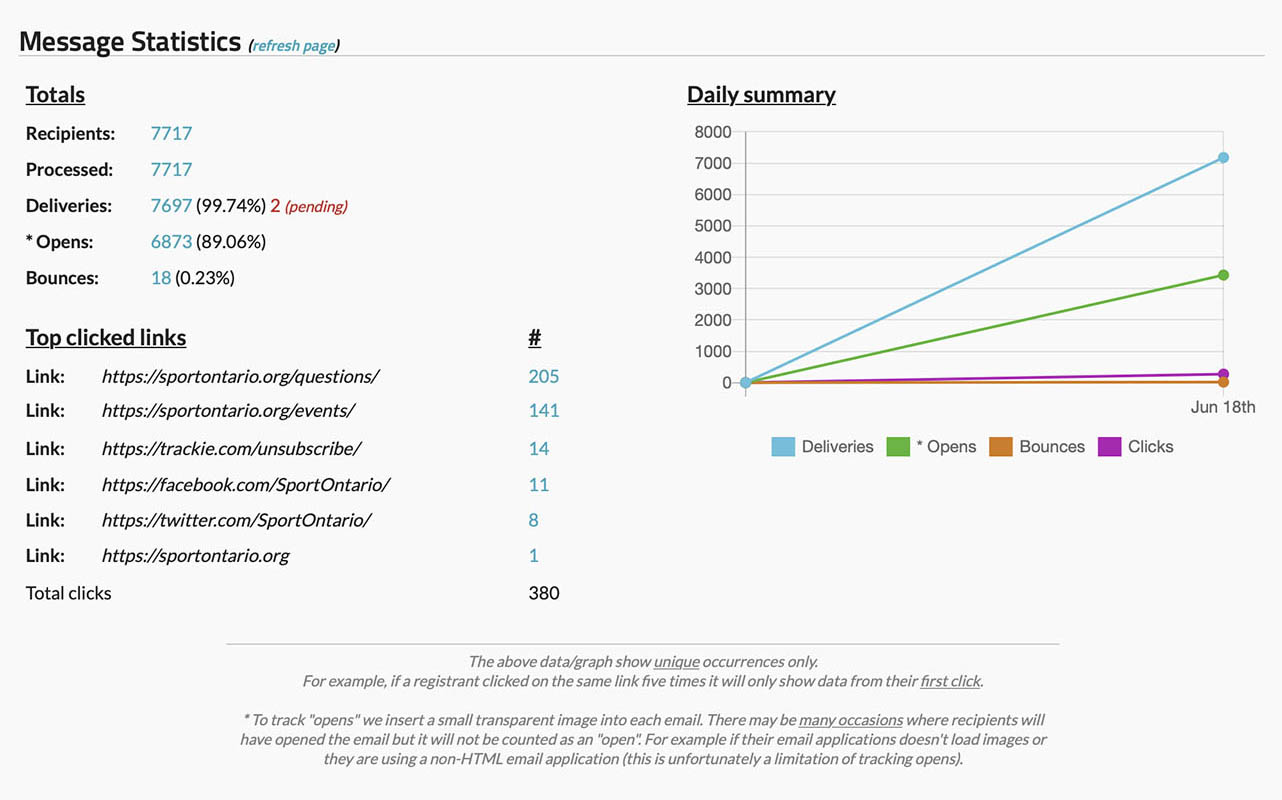
Settings
RecipientsDisplays the total number of unique email addresses to which the email was sent. You can click on the blue numbers to access detailed information about each individual email. ProcessedDisplays the total number of processed emails. Please note that the processing time for all emails may vary depending on the size of your email list. It may take several minutes for all emails to be processed. If there are still pending emails being processed, you will see a red "# (pending)" link displayed on the right side. DeliveriesDisplays the total number of delivered emails. Please note that the delivery time for all emails may vary depending on the size of your email list. It may take several minutes for all emails to be delivered. If there are still pending emails, you will see a red "# (pending)" link displayed on the right side. OpensDisplays the total number of recipients who have opened your email. To track "opens" we insert a small transparent image into each email. There may be many occasions where recipients will have opened the email but it will not be counted as an "open". For example if their email applications doesn't load images or they are using a non-HTML email application (this is unfortunately a limitation of tracking opens). BouncesDisplays the total number of bounced emails. Typically, bounces occur due to email address typos, and it is advisable to review and rectify them whenever possible. In case of multiple email bounces, the system will automatically cease further attempts to send to that particular address. Top clicked linksDisplays the links within your email that have been clicked on by recipients. Daily summaryDisplays a quick graphical view of your statistics.
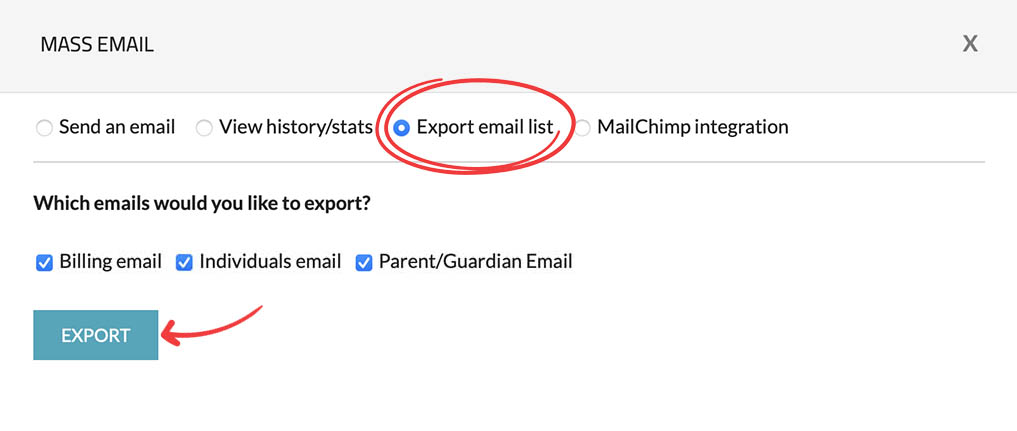
You have the option to export your email list if necessary. This can be beneficial if you wish to import your list into an external program or open it in software like Microsoft Excel.
To access the export functionality, you can select the "Export email list" radio button, choose the emails you wish to export, and then click the "EXPORT" button to initiate the export process.
Our system offers a seamless integration feature that allows you to connect your registration email list with an external MailChimp account. MailChimp is a popular email sender company, and you can find more information about their services on their official website: https://mailchimp.com.
To establish a connection between your registration email list and MailChimp, please follow these steps:
-
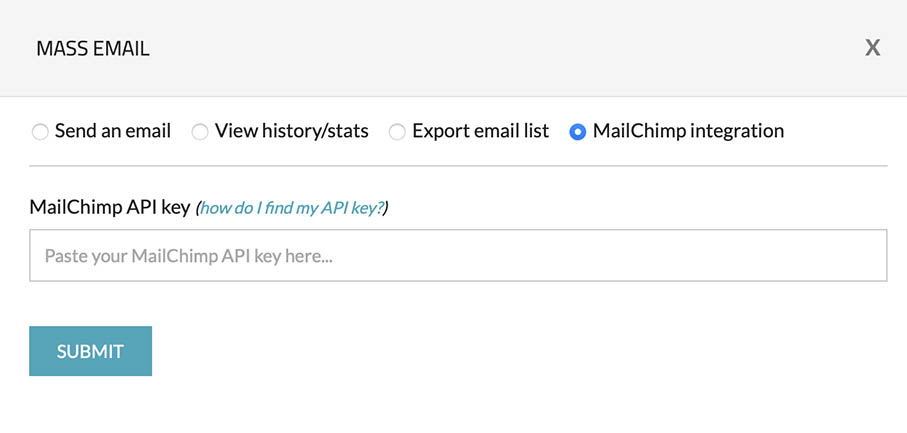
Select the "MailChimp integration" radio button.
-
Enter your MailChimp API key in the input box. If you need assistance in finding your API key, you can refer to this article for detailed instructions.
Your API key will resemble something like above (please note that this is not a real key, it is used for illustrative purposes only).
-
After clicking "SUBMIT" you will be presented with a screen like the below:
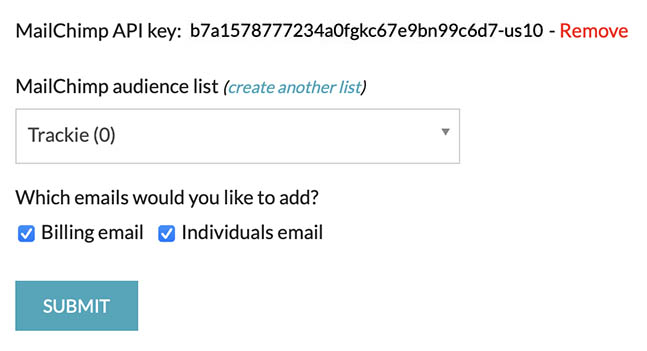
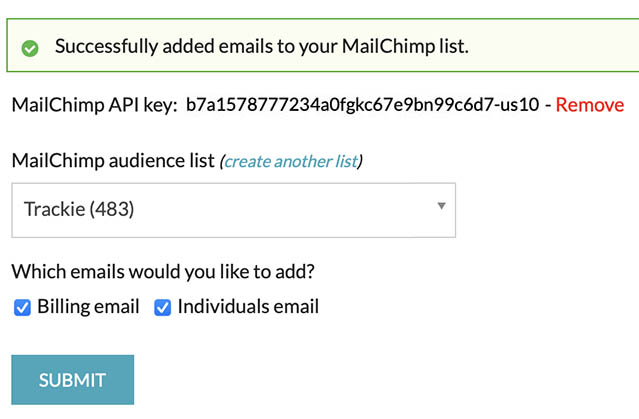
Select the MailChimp audience to which you want to import your registration email list, the emails you want to import, and then click on the "SUBMIT" button to initiate the process.
-
Please note that the import process may take several minutes, depending on the size of your list. Once completed, you will receive a success message displayed at the top of your page, along with the total number of emails that have been successfully imported to your MailChimp audience.
-
After successfully importing your registration email list to your MailChimp audience, you can log in to your MailChimp account to send emails to your registrants.